









PokeClicker
You begin PokeClicker in Pallet Town holding a single Pokeball, zero Quest Points, and one breeding slot that is still empty. Every region past Kanto is locked behind a Champion you have not met yet, the Farm on Route 11 does not exist as far as your save file is concerned, and your only tool for catching anything is a click that chips a small amount of damage off whatever wild Pokemon happens to be on screen. Nothing has been caught, no Gym has fallen, and the underground beneath Kanto has not been touched by a single swing of a Hammer.
Early Kanto Decisions That Shape a PokeClicker Run
The opening hours of PokeClicker are built around a single click that doubles as both your attack and your only form of interaction with wild Pokemon. Each click against a wild Pokemon's health bar brings you closer to a catch, and catching that same species repeatedly keeps raising its Click Attack, which is the stat most new players underestimate. A lot of beginners treat the early routes like a formality to rush through, when in fact the attack gains made on Route 1 and Route 2 are what make every later Gym fight bearable instead of a long stare at a stalled health bar.
New players also tend to ignore the game's economy in the other direction, assuming progress only comes from clicking harder. Quest Points trickle in from completed quests long before Gym battles start feeling easy, and spending them the moment they appear on whatever shop item is available is a common early mistake, since better uses for QP show up only a few hours later.
Early in the game, before Route 11 is even reachable, the only economy that matters is Pokedollars earned from defeating wild Pokemon. Every Gym attempt before that point feels slower than it eventually will, simply because neither Auto Battle nor a deep roster of bred Pokemon exists yet.
Breeding, Vitamins, and Chasing Shiny Odds
Breeding in PokeClicker is less about collecting a second copy of a Pokemon and more about permanently raising your attack ceiling. Hatching an egg gives that Pokemon's attack a permanent boost equal to twenty-five percent of its base value, which compounds across a whole box of hatched Pokemon over a long run. Players start with exactly one breeding slot, and each additional slot costs five hundred Quest Points multiplied by the slot number, capping out at four slots total, so the decision to save QP for a second or third slot instead of spending it on shop items is one of the bigger strategic forks in the early game.
Vitamins layer on top of breeding by reducing the number of egg steps needed to hatch, which matters most to players chasing shinies, since breeding carries noticeably better shiny odds than a random encounter, sitting around one in one thousand twenty-four. A shiny Pokemon is not just a different color in PokeClicker; it carries a fifty percent bonus to Click Attack over the same species in its normal coloring, which is why dedicated breeders will cycle the same species through a slot for hours.
The grind to afford that fourth breeding slot is one of the parts of PokeClicker players openly complain about. The Quest Point cost scales fast enough that casual players rarely bother chasing more than two or three slots.
Gyms, Auto Battle, and the Grind to Unlock It
Every Gym Leader in PokeClicker has to be beaten manually the first several times before the game trusts you to automate the fight. Specifically, a Gym unlocks Auto Battle only after its Leader has been defeated ten times by hand, which turns the first visit to any new Gym into a repetitive clicking session rather than the quick farm it becomes afterward. Once unlocked, Auto Battle quietly runs that Gym in the background, letting your Click Attack and team carry fights that used to demand your full attention.
Oak Items add another layer on top of Gyms and routes, boosting things like click damage or Pokemon attack, but only three can be active at once. Deciding which three Oak Items to run at a given stage of the game is a recurring decision players revisit as new items unlock, and there is a challenge mode that disables Oak Items entirely for anyone who wants a harder version of the same Gym and route grind.
The Underground, the Farm, and Dungeon Routines
Hammer and Chisel are the tools used to break through underground walls and reveal hidden treasure, which can be sold for shards or diamonds depending on what turns up. Dowsing Machine improves the odds of those digs turning up a diamond, pushing Kanto's base diamond rate of roughly one in two thousand forty eight up to about one in one thousand three hundred sixty five, a jump that becomes far more generous once you are mining in a region like Paldea instead. Berries, grown on the Farm that unlocks once you reach Route 11, can be replanted to grow more berries or sold outright, giving the Farm a slow-burn economy of its own that sits apart from clicking and Gyms entirely.
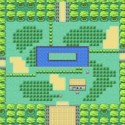
Dungeons follow their own separate rhythm. Viridian Forest, reachable from Route 2, is the first dungeon in the game and introduces the choice every later dungeon repeats: rush straight to the boss, grab chests on the way to the boss, or clear the whole floor. The map itself visibly shrinks the first time you cross certain clear-count thresholds, most noticeably once a dungeon has been cleared a hundred times, settling into a cramped five by five layout that veteran players recognize instantly and newer players are often surprised by the first time it happens.
Roaming Pokemon and the Push Into Johto
Leaving a region behind in PokeClicker normally means defeating that region's League Champion, though a Pokedex-focused playthrough adds the extra requirement of catching everything available first. That second condition is where roaming Pokemon become a problem, since their encounter rate starts at one in eight thousand one hundred ninety two on a region's first route and only climbs as high as one in four thousand ninety six by the last route.
Johto's three roaming legendary beasts are the single most-cited bottleneck for players trying to finish a full Pokedex clear. By the time you are trying to leave Johto behind for Hoenn, hunting those three roamers across dozens of routes has usually become the slowest part of the whole run.
Questions Players Keep Asking About PokeClicker
- How do you unlock Auto Battle for Gyms in PokeClicker? Defeat that Gym's Leader manually ten times. After the tenth win, Auto Battle becomes available for that Gym and runs the fight automatically from then on, freeing up your attention for routes and dungeons elsewhere.
- What is the fastest way to find a shiny Pokemon in PokeClicker? Breeding gives noticeably better shiny odds than wild encounters, roughly one in one thousand twenty four. Using Vitamins to cut down egg steps lets you cycle a breeding slot through more hatches in less time, which is the closest thing to a reliable shiny-hunting method.
- Why does Johto take so long to clear in PokeClicker? The three roaming legendary beasts have low per-route encounter rates, starting around one in eight thousand one hundred ninety two on a route's first appearance. That rate only climbs as high as one in four thousand ninety six by a region's last route, which makes a full Pokedex clear of Johto far slower than simply beating its Champion.
PokeClicker rewards the kind of patience that most incremental games only ask for in short bursts, from the ten manual Gym wins needed before Auto Battle kicks in to the long odds behind every shiny hatched in a breeding slot. The Hammer and Chisel work you put into the underground, the berries you grow once Route 11 opens up, and the roaming beasts you eventually track down in Johto all feed back into the same simple click that started the whole run in Pallet Town.